
 That’s right, it has a soundtrack.
If you’ve made the choice to play Pokemon Black or White, you’ve already made a great choice. It has aged well as a true gem in the Nintendo DS lineup. You may be playing it, but are you playing it right?
To play a game of Pokemon right involves choosing the right team for a playthrough. After all, what says that you’re great at a game quite like beating it quick? Not only that, you’ll be quicker to open up the postgame and get right down to the finer aspects of competitive play.
A lot went into making this guide. Most in-game teambuilding guides for Pokemon games seem to focus on meeting an arbitrary requirement for filling out all six team spaces. There are a few problems with this, most notably, that late-game experience doesn’t spread as well among a team of more members. For the most part, you’ll be better off having a team of a few slightly over-leveled battlers than a full team that doesn’t quite measure up. Not only that, but many teams don’t seem to consider dedicated HM users, which can increase the player’s mobility. Without HM users considered when teambuilding, players might have to place team members in boxes to seek out ways around progress-hindering obstacles.
Pokemon Black and White does shake things up, however. For one thing, the way EXP works in this generation is changed so that the EXP a pokemon gains is multiplied using a formula that involves their level compared to the level of their opponent. A lower level pokemon gains more EXP than a higher level pokemon defeating a similar pokemon of the same level. This makes it easier for freshly-caught pokemon to catch up to the rest of your team, and it also makes it harder to over-level.
Not only that, HMs aren’t as necessary for a playthrough as they were for other games in the series. The only HM that’s needed to progress is Cut, which is used early on. After that, HMs are pretty much optional, and usually just take you off the path. There are two that make things easier on Victory Road, but even then, they aren’t a necessity.
Teambuilding for this guide got trickier still when it comes to just how many pokemon in the 5th generation are great battlers. There are a lot of pokemon that almost made it onto the team, that still would have made great choices. So if a pokemon that you chose didn’t make the team, you might still have a pretty effective team.
Much of this guide focuses on pokemon that would be of help when facing Ghetsis’ Hydreigon. Hydreigon is the main opponent that players complain about when playing through this game. Yeah, Ghetsis is the final boss, and final bosses tend to be challenging, but Ghetsis with his Hydreigon has proven to be a little much for numerous players.

Hydreigon is a vicious pokemon, and it’s a winner even in competitive play, with great typing, a wide movepool, excellent stats, and a helpful ability. Ghetsis’ Hydreigon is right up there with Whitney’s Miltank in terms of challenge, and enough players have voiced their frustrations that it’s justifiable that this guide places a focus on helping them out. As challenging as the gym leaders are in this game, they’re still trivial compared to Ghetsis, mainly because of his Hydreigon.
Now, onto the team choices:

Name: Oshawott
Location: Starter
When obtained: Outset
Evolves: at Level 17 and again at 36
How this little guy came to be so adored is an interesting story, but it also happens to be the most practical starter choice, all things considered. Because its physical and special Attack stats are both usable, it’s actually reasonable for Oshawott to have two Water moves on its moveset, allowing it to grill statistical weaknesses of a variety of opponents with moves based on its type. By the late game, this guy clearly tends towards the physical side of things, particularly with access to the excellent move Swords Dance, which gives Oshawott the ability to sweep entire teams.

Name: Pansear
Location: Dreamyard, as a gift (requires having selected Oshawott)
When obtained: Before obtaining first badge
Evolves: With Fire Stone
Rainbow Monkeys! Pansear is a pretty bad pokemon, but he’s got some selling points for an early game of Black or White. For one thing, he’s got a type advantage against many early opponents, which makes up for how pathetic his attacks otherwise are. He also is a convenient option to teach Cut, which is necessary to use just once in a playthrough. Teaching it to Pansear will keep moves available for the rest of your team.
Pansear is mainly useful against the first and third gym leaders. Against the third, he does really well if you evolve him with a Fire Stone, which can be obtained in Castelia City from a scientist. The scientist gives you a choice between three stones, so if you goof and get the wrong one, you’d have to obtain a Fire Stone from somewhere else.
After the third gym, you should probably box this guy, because he won’t be contributing much more to your team, otherwise.

Name: Drilbur
Location: Wellspring Cave (dust cloud)
When obtained: After obtaining first badge
Evolves: Level 31
Drilbur is like the Wolverine of Pokemon: he may be small, but he means serious business. Drilbur learns a variety of useful moves, including Dig, which is seriously strong for the point when he obtains it. And once this guy evolves at level 31, that’s when things get even better: he’ll pick up an additional Steel typing, which gives this little guy a pile of resistances. What’s more, he’ll be levels away from learning Earthquake, one of the best moves in the game, and Swords Dance, which allow him to demolish most opponents.

Name: Scraggy
Location: Route 4 (higher level at Relic Castle)
When obtained: Before third badge
Evolves: Level 39
Simply OP. Scraggy is such an excellent pokemon that it may quickly become your team’s MVP. Fighting and Dark are great types, but putting them on the same pokemon gives it an immunity to a type that would normally be trouble to one of them. They’re great attack types, giving you an advantage against three of the members of the Elite Four. Not only that, but the moves this guy learns are relatively powerful. And if you get one with the Moxie ability, that alone can help him build momentum which can make him unstoppable against many in-game opponents with larger teams.
The main drawback to Scraggy is that he is a little on the slow side. But that really doesn’t hold him back by much.

Name: Archen
Location: Somewhat complicated, see below.
When obtained: After third badge
Evolves: Level 37
Players were at first quick to write off Archen because its ability was more of a penalty than a benefit. But then they noticed that its excellent Speed and Attack stats allowed it to wipe out numerous in-game opponents with Acrobatics, which it could learn early on without the need for Skyla’s TM, thank you very much. That alone is justification for having Archen on your team, but there’s more: his move selection is excellent. Crunch? Shadow Claw? Rock Slide? Archen can really bring a whoopin’.
About that ability, it only kicks in when its HP is at half or less. Because you can stock up on healing items like Lemonade from vending machines, it’s a snap to keep this guy’s morale up.
You might be wondering how to obtain this guy. After the third badge, you can access the Relic Castle in the Desert Resort. A backpacker inside gives you a choice between the Cover Fossil and the Plume Fossil. Choose the Plume Fossil (the second choice). Then, take it to Nacrene Museum, where it can be restored into an Archen. Save before the exchange at the Museum if you wish to soft-reset for a particular nature. Adamant or Jolly work great.

Name: Herdier
Location: Cold Storage
When obtained: Before 5th badge
Evolves: No need to worry about it.
The main point of having Herdier on your team is that it’s a nice, convenient pokemon that can learn both Surf and Strength, two moves that make the trip through Victory Road much easier. There’s no hurry to get one before then, so you can come back for it. It pretty much helps you through the use of these HMs, but they aren’t even mandatory to get through Victory Road.
It’s spoilers from here on out, so it’s up to you whether you read on and ruin the surprise. They begin immediately after the picture of the two legendary pokemon below:
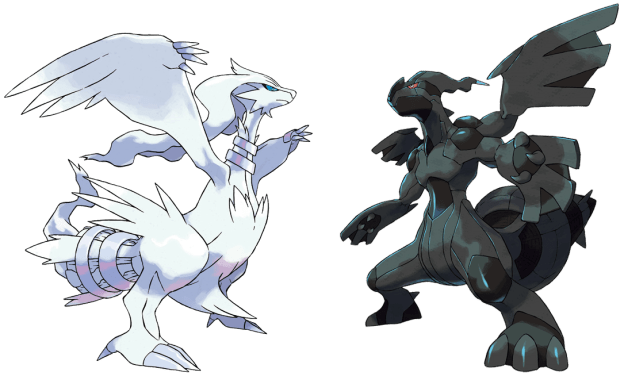
Name: Reshiram (Black version), or Zekrom (White version)
Location: N’s Castle
When: Immediately after the Elite Four
Evolves: They don’t, and don’t really need to.
Wow, your league challenge really got derailed, didn’t it? Now it’s time for an epic throne room showdown that seems somehow reminiscent of Gilgamesh. But first, you’ll need a legendary pokemon to face N’s. It’s pretty much a scripted event, and the catch rate for the legendary is pretty high (no need to use the Master Ball). Afterwards, if you already have six pokemon on you, you are given the option to immediately box one so you can add the legendary directly to your team.
Nothing really needs to be said to sell anyone these legendaries, seeing as they have to be caught to advance the story (a few clever players have found a way around it, but it’s really not worth the effort just to say you did). They’re both strong Dragon types, but with some differing characteristics:
- Reshiram, the white one, is exclusive to the Black version. It’s a Fire type, and is more inclined to being a Special attacker,
- Zekrom, the black one, is exclusive to the White version. It’s an Electric type, and is more inclined to being a physical attacker.
After catching it, you can have it in your party for the next two battles. If you immediately add it to your party, it will take point, so it will face N’s dragon right away, which he leads with. N’s dragon seems programmed to continue using a move until your own legendary dragon uses it’s own equivalent, which is actually to your advantage. The two dragon’s signature moves go that if they both use them on the same turn, the one to attack after the first gets a power boost. N’s pokemon is a couple levels higher, so your own would be likely to go second. So go ahead and grill that weakness, because the game seems to want you to.
Outside of that, N’s team doesn’t have much to challenge you. Be warned that he has a Zoroark on his team, so there’s potential for mistaking one of his pokemon for another.
In case you’re concerned, you do get your team healed before the battle with N, and before the battle that immediately follows. Yeah, it’s Ghetsis that’s up next. That and his famous Hydreigon. Thankfully, you have plentiful strategies to get you through him, but they take planning, and not every player plays through with a confrontation with him in mind.
First, the stats on Hydreigon:
Hydreigon
Level: 54
Nature: apparently random
Item: None
Ability: Levitate (grants immunity to Ground-type attack moves)
Moves: Dragon Pulse, Fire Blast, Surf, Focus Blast
Hydreigon has decent bulk, a nice Speed stat, and a high Special Attack stat for those special attacks to come off of. It has a set of very strong moves with excellent coverage, so it’s little wonder that it wipes out the teams of many a player who felt confident after beating everything else up to that point. You know that super-powerful Dragon-type legendary pokemon you just caught that supposedly has enough power to destroy the Unova region? Ghetsis just laughs at it. Hydreigon is not a joke.
As much as I wanted to use some damage calcs in this, it appears that the nature of most trainer’s pokemon in Black and White are random, with those of Ghetsis included. Because of that random element, there may be some wide variation in the outcome of the battle with Hydreigon. You might get off well and he doesn’t get a nature that benefits Hydreigon much, or he might get a Modest nature and wipe your team out easily.
Also, be aware that Ghetsis can use Full Restore up to 4 times during the battle. If you count the number of times he uses one, that could make the battle more predictable.
If you plan on taking on Hydreigon the old fashioned way, you’ll want the pokemon that you’re saving for it to remain at full HP until the time comes for them to face it, otherwise, it’s going to be hard for them to tank its moves and return fire. Many of your best choices Hydreigon will likely outspeed, which makes it much harder to go blow-for-blow with the thing.
There are a couple fine Fighting types that might serve you well if you go with them: Sawk and Throh. If you choose to go with either of these, they’d likely replace Scraggy on your team. I recommend Scraggy because it’s better against more of the game’s opponents. Between Sawk and Throh, which one is easier to find depends on the version you’re playing, but they are both available in both games.
If you go with Sawk, it will be preferable for it to have the Sturdy ability. This will allow it to survive one of Hydreigon’s moves, and get an attack in. At level 46, Sawk can get a likely 2HKO with Brick Break, but you’ll be much better off with Close Combat at level 49. If Sawk reaches level 55, it gets a very likely OHKO with Close Combat.
Throh is superior as far as its defense stats go; it’s out of OHKO range by about level 39 (of course, crits can happen). At around level 48, Throh gets a 2HKO with Storm Throw. It learns Superpower at level 49, but has to be brought up to a high level of 58 to get a likely OHKO.
You can still attempt Scrafty, though. The main move to watch out for would be Focus Blast, which it’s weak to, but because Focus Blast has an accuracy of 70%, it’s a risk that can pay off. Use caution if going for Hi Jump Kick, as it has an accuracy of 90%, and if it misses, Scrafty takes a big blow. Scrafty is such a heavy hitter that a Hi Jump Kick can do 50% of Hydreigon’s HP by around level 40, and at level 58, it’s a OHKO.
Samurott is usable, as it’s not weak to any of Hydreigon’s moves. It’s still likely to take over 50% damage due to how strong its attacks are, but at least it can tank a hit and get in one of its own. Revenge would be a prime choice, because Hydreigon is weak to it, and it does more damage if the user took damage already on the same turn. Hydreigon only has attack moves, so Revenge might serve you well. Samurott is likely out of OHKO range by level 46, and Revenge can take a decent chunk out of Hydreigon.
However, levels like 55 and 58 are kind of hard to reach, unless you have a stock of Rare Candies to spend right before battling the legendary (your last chance to use them if you plan on beating the last bosses on the first try). Your team may be at around level 50 by this point, so it would take some power-leveling to reach such high levels, which doesn’t really lend itself to an efficient playthrough. But there are other strategies that you could use.
One fun and somewhat cheesy strat is to immediately switch to Excadrill at the start of the battle, as Ghetsis leads with Cofagrigus. Cofagrigus uses the Toxic/Protect strategy, but because Excadrill is a Steel type, it can’t be poisoned. What’s more, Excadrill resists Cofagrigus’ attack moves, so there isn’t much it can do about Excadrill.
Preferably, you want Swords Dance and X-Scissor (which Hydreigon is weak to) on Excadrill’s moveset. The idea is to use Swords Dance until Excadrill’s Attack stat is as high as it can get, then use X Speed on it a few times so it can outspeed anything on Ghetsis’ team. Use healing items as needed. You might also want to use a couple X SpDef to make up for the Special Defense drops that have a chance of happening due to Cofagrigus’ moves. Once you’re ready, you can have Excadrill go ahead and attack. Excadrill will likely be able to wipe out Ghetsis’ entire team by itself, Hydreigon included.
There is another strategy you can use, and it’s easily the most reliable and hilarious of what’s available. I’ve tested it, and I can tell you through experience that it works.
You’re up against an oppressive and tyrannical force. And your weapon is Roggenrola.

Name: Roggenrola
Location: Various, but preferably Wellspring Cave
When obtained: After first badge
Evolves: Don’t worry about it.
Roggenrola gets Sturdy as its ability, so if its HP is full, it can withstand an attack move with 1 HP remaining. If Roggenrola is low enough in level, then you can easily replenish its HP with a cheap item like Fresh Water, which you can buy at vending machines. See where I’m getting at?
But you’re not just stalling out Hydreigon’s moves, you’re messing with it. As it so happens, Roggenrola learns Sand Attack, which it likely has when you catch one at Wellspring Cave. So not only can Roggenrola withstand Hydreigon’s attacks, it can also lower its accuracy. If Hydreigon can’t get a move in, it won’t matter how strong its moves are. Six uses of Sand Attack will be all it takes to bring Hydreigon’s accuracy to its minimum.
But it gets better. Roggenrola can be taught Toxic by TM, so it quickly loses HP as it swings away at Roggenrola in vain. Better still, Roggenrola can be taught Protect, which puts it in a better position to stall out Hydreigon as its HP drains away. If Ghetsis uses a Full Restore, just use Toxic again.
One thing that can potentially go wrong with this strategy would be that Fire Blast might cause a burn, which could take away Roggenrola’s last HP. If you still have a Rawst Berry which you can get from Pokemon Rangers, you can give Roggenrola one to hold as a precaution, in case things go wrong.
The TM for Toxic can be reached once you have a pokemon with Surf. It’s on Route 17, and can be easily reached. As for the TM for Protect, you can obtain one from Professor Juniper at her lab once you’ve seen at least 60 pokemon. That’s pretty easy to accomplish through the course of the game.
So, there you have it! Now you know how to beat Ghetsis and his Hydreigon, and in so doing, beat Pokemon Black and White. Then you might be ready for the postgame, where you face some seriously overleveled opponents, including a buffed-up Elite Four.
Hey, Pokemon Black and White are great games to play if you’re looking for a challenge.
